Create Woodcuts Effect | Photoshop Tutorial
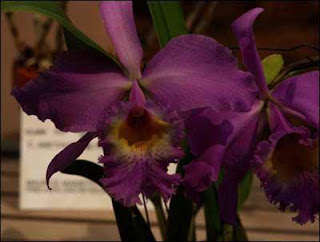
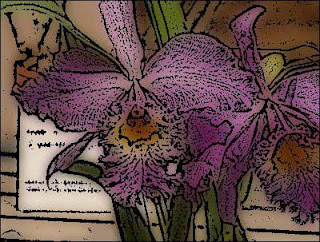
The woodcut look is always popular. It’s a common technique in Illustrator, but it is both easy and fast to do in Photoshop as well. You can find many ways to alter and add to this technique, but here’s how to create a basic woodcut image using a photo as the base image.
1.Prepare the image.Choose Image > Duplicate > OK to make a copy of the original image. Never work on your original—only work in the copy. You may close the original image now and leave the copy open.
2.Prepare the Layers.
Drag the Background layer of the image to the New Layer icon at the bottom of the Layers palette. The new layer is named Background Copy. Double-click on the layer name in the Layers palette and replace the default name with Woodcut layer.
Drag the Background layer of the image to the New Layer icon at the bottom of the Layers palette. The new layer is named Background Copy. Double-click on the layer name in the Layers palette and replace the default name with Woodcut layer.
3.Change the Blend Mode.
Change the Blend mode of the Woodcut layer from Normal to Multiply by clicking on the word “Normal” at the top of the Layers palette and selecting Multiply from the drop-down menu. The image looks dark, but by changing the mode to Multiply now, you will be better able to preview the filters and commands that you will use.
4.Apply High Pass.
Choose
Filter > Other > High Pass and set the Radius to 1.6. Click on
OK. I use this setting consistently as it preserves a lot of detail in
the image. Because of the Multiply mode, you don’t really see the High
Pass filter on the image, but the filter has made the Woodcut layer into
a
low-contrast grayscale image.
5.Change the Woodcut layer to black and white.
Choose Image > Adjustments > Threshold. The default Threshold Level is 128. You could accept this amount, but I usually like to cut the amount of black over the image to no more than 127. Drag the Threshold Level slider to 127 and click on OK. This step actually creates the woodcut look. The Multiply blend mode enables you to see and judge the result on your image. The more you lower the Threshold Level, the less “woodcut” you will see.
Choose Image > Adjustments > Threshold. The default Threshold Level is 128. You could accept this amount, but I usually like to cut the amount of black over the image to no more than 127. Drag the Threshold Level slider to 127 and click on OK. This step actually creates the woodcut look. The Multiply blend mode enables you to see and judge the result on your image. The more you lower the Threshold Level, the less “woodcut” you will see.
6.Blur the Background.
Make the Background layer active by clicking on its thumbnail in the Layers palette. Choose Filter > Blur > Gaussian Blur with a Radius of 6.3. Click on OK. You will need to adjust this setting to your own preferences based on the amount of softness that you like and the size of the image. Larger size images need a higher radius to obtain the same amount of softness.
Make the Background layer active by clicking on its thumbnail in the Layers palette. Choose Filter > Blur > Gaussian Blur with a Radius of 6.3. Click on OK. You will need to adjust this setting to your own preferences based on the amount of softness that you like and the size of the image. Larger size images need a higher radius to obtain the same amount of softness.
7.Conclusion.
Adjustments abound in this technique! You could completely change the image in the background because the woodcut provides the image detail. You can use the Levels command to lighten the background layer if it is too dark. You can vary the setting of the High Pass filter to create a woodcut with less detail in it. I frequently use the Filter > Noise > Dust & Scratches filter with a Radius of 20 and a Threshold of 0 in place of the Gaussian Blur filter. On many images, Dust & Scratches does a better job than the Gaussian Blur filter of preserving the original image colors.
You can produce finer detail by applying the technique to an image that is larger than you need and then using the Image > Image Size command to resample the image to a smaller size. The image shown below makes all of these changes. Finally, you can save all of your steps as an Action to apply with one click.


0 comments:
Post a Comment